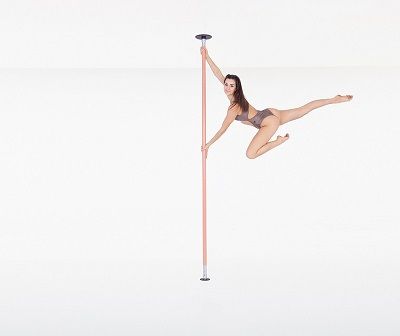
Welcome to the world of pole fitness! Installing a fitness pole at home allows you to unlock a fun and empowering workout experience. But how to install a pole at home safely? This comprehensive guide walks you through everything you need to know for a safe and successful fitness pole installation at home.
Choosing the Perfect Pole for Your Needs
Selecting the right pole is foundational to your pole dancing journey. Consider these crucial factors:
Pole Type
Determine whether a static or spinning pole aligns with your skill level and desired pole dancing style. Static poles offer beginners stability while spinning poles introduce an element of challenge and dynamic movement for more experienced dancers. We recommend poles with static and spinning functionalities, offering you the versatility to explore different pole dancing styles and techniques. Consider the X-Pole Xpert NXN Chrome, a popular choice for its smooth chrome finish, secure locking mechanisms, and ability to switch between static and spinning modes seamlessly.
Pole Material
Stainless steel, powder-coated, and chrome are common pole materials with unique characteristics. Stainless steel is renowned for its durability and sleek appearance, while powder-coated provides exceptional grip. Consider your preferences and budget when making your choice.
Investing in a high-quality pole from reputable brands like Lupit Pole and X-Pole ensures safety and performance.
Prioritizing Safety: Essential Considerations
Safety is non-negotiable when installing a pole. Adhere to these crucial guidelines:
- Comprehensive Ceiling and Floor Assessment: Before installation, thoroughly evaluate your ceiling and floor to ensure they can safely support the weight of the pole and a person. A professional assessment may be necessary if you have any doubts.
- Create a Clear Installation Area: Remove furniture, clutter, and any potential hazards from the designated pole space to prevent accidents.
- Enlist a Spotter: Having a trusted friend or partner assist you during the installation process, especially for heavier poles, can significantly enhance safety.
- Meticulously Follow Manufacturer’s Instructions: Adhering to the specific guidelines provided by the pole manufacturer is essential for optimal safety and performance.
Crafting Your Ideal Pole Dancing Space
The location of your pole significantly impacts your overall pole dancing experience. Consider these factors when choosing the perfect spot:
- Ample Space: For basic pole moves, a clearance of 4-5 feet around the pole is sufficient. However, to comfortably execute a variety of tricks, including spins and inversions, aim for 6-8 feet or more of clear space. For advanced pole dancers, even larger spaces can enhance freedom of movement.
- Optimal Ceiling Height: Ensure there is adequate distance between the pole and the ceiling to prevent head injuries. Most poles require a minimum ceiling height of 7 feet.
- Floor Type: While any floor can accommodate a pole, carpeted floors offer superior grip and cushioning. Hardwood or vinyl floors may necessitate additional grip aids.
- Prioritize Ventilation: Proper ventilation is essential for maintaining a comfortable and safe practice environment.
- Explore Potential Locations: Consider dedicated home gyms, basements, lofts, or garages, taking into account space, ceiling height, and ventilation.
Identifying Unsafe Conditions: When Not to Install a Pole
While pole dancing is an exhilarating activity, prioritizing safety is paramount. Avoid installing a pole in the following circumstances:
- Unsupported Ceilings: If your ceiling cannot safely support the weight of both the pole and a person, installation is strictly prohibited.
- Insufficient Ceiling Height: Low ceilings increase the risk of head injuries, making pole installation inadvisable.
- Unstable Flooring: Weak or unstable floors can compromise safety and should be avoided.
- Structural Damage: Existing damage to ceilings or walls can affect the pole’s stability and should be addressed before installation.
- Rental Property Restrictions: Check with your landlord to ensure pole installation is permitted in your rental property.
Step-by-Step Installation Guide: Building Your Pole Dancing Haven
The installation process varies depending on the pole type (tension, ceiling-mounted, or floor-to-ceiling). Always refer to the manufacturer’s instructions for detailed guidance.
- Prepare the Installation Area: Thoroughly clean and clear the designated space to create a safe working environment.
- Assemble the Pole Components: Carefully follow the manufacturer’s instructions to connect the pole sections.
- Secure the Pole: Attach the pole to the ceiling or floor using the provided hardware, ensuring it is firmly secured.
- Test for Stability: Before use, carefully apply weight to the pole to verify its stability.
Nurturing Your Pole Dancing Journey: Post-Installation Care
Proper care is essential for maintaining your pole’s condition and ensuring your safety:
- Regular Inspections: Conduct routine inspections to check for any signs of wear, loose screws, or damage.
- Adhere to Maintenance Guidelines: Follow the manufacturer’s recommended cleaning and maintenance procedures.
- Utilize Safety Equipment: Consider using grip aids, knee pads, or other protective gear to enhance safety.
- Invest in Professional Instruction: Enrolling in pole dancing classes can improve your technique, build confidence, and enhance safety.
Visual Guides
For a visual demonstration of the pole installation process, refer to these helpful videos:
By following these guidelines and prioritizing safety, you can create a fulfilling and empowering pole dancing experience. Remember, if you have any doubts or concerns about the installation process, consult a professional installer.
To discover a wide range of high-quality poles to suit your needs and preferences, visit our pole shop at https://eng.verticalwise.shop/


